

Key Takeaways
A reliable starting system depends on more than the starter motor alone. Careful testing, correct fitment, and sensible maintenance help prevent repeat failures.
- Test the battery, cables, and grounds before condemning the starter motor.
- Match replacement parts to the exact vehicle, engine, year, and existing unit.
- Inspect the solenoid, drive gear, brushes, bushings, and mounting hardware.
- Choose a rebuild when the main housing and armature remain serviceable.
- Recheck cranking performance after installation rather than assuming the repair is complete.
Understanding the starter motor system
The starter motor converts electrical energy into the mechanical force needed to turn the engine. It works briefly but under a heavy load, so a small weakness in the battery or wiring can look like a failed motor. Understanding the whole circuit makes diagnosis more accurate and helps you select the right Ssangyong starter motor parts.
How the starter motor cranks the engine
When the ignition switch or start control is activated, current reaches the starter solenoid. The solenoid moves the drive gear into engagement with the engine’s ring gear and closes the high-current circuit. The motor then spins the gear, turning the crankshaft until combustion takes over.
The starter is not designed to run continuously. Excessive cranking creates heat in the windings, brushes, cables, and solenoid contacts. Pause between attempts, particularly when the engine is not firing for a separate fuel, ignition, or immobilizer reason.
The role of the battery, solenoid, and wiring
The battery supplies the initial current, while the solenoid acts as both an actuator and a high-current switch. Positive cables carry power to the starter, and the engine block, chassis, and battery ground complete the return path. A loose terminal or corroded ground can reduce current enough to cause a slow crank without any internal starter failure.
A useful first distinction is between a no-crank condition and a crank-but-won’t-start condition. The starter system is involved in the first; the second generally requires checks outside the starter circuit.
Common Ssangyong models and starter configurations
Starter configurations vary across models, engines, production years, and transmission applications. Listings commonly cover vehicles such as the Musso, Korando, Actyon, Kyron, Rexton, Rodius, and Tivoli, but a model name alone is not enough to identify a part. The same body range may use different output ratings, tooth counts, mounting patterns, or electrical connections.
For that reason, treat a vehicle listing as a starting point rather than final proof. Compare the old unit and the vehicle identification details before ordering.
Symptoms of a starter system problem
A single click, repeated clicking, silence, or slow rotation can each point to a different part of the system. A grinding sound may indicate poor gear engagement, while a starter that spins without turning the engine can suggest an overrunning clutch or drive problem. Intermittent operation deserves attention even when the vehicle eventually starts.
Record what happens at the key or start button, whether the lights dim, and whether the symptom changes when the engine is warm. Those observations give a technician more useful information than simply reporting that the car will not start.
Identifying Ssangyong starter motor parts
A starter motor is a compact assembly made up of several serviceable and wear-prone components. The outer shape, mounting ears, electrical terminals, and drive gear are visible clues, while the armature, brushes, and bushings require removal for close inspection. A clear inventory of the unit prevents replacing one worn piece while leaving another damaged part in place.
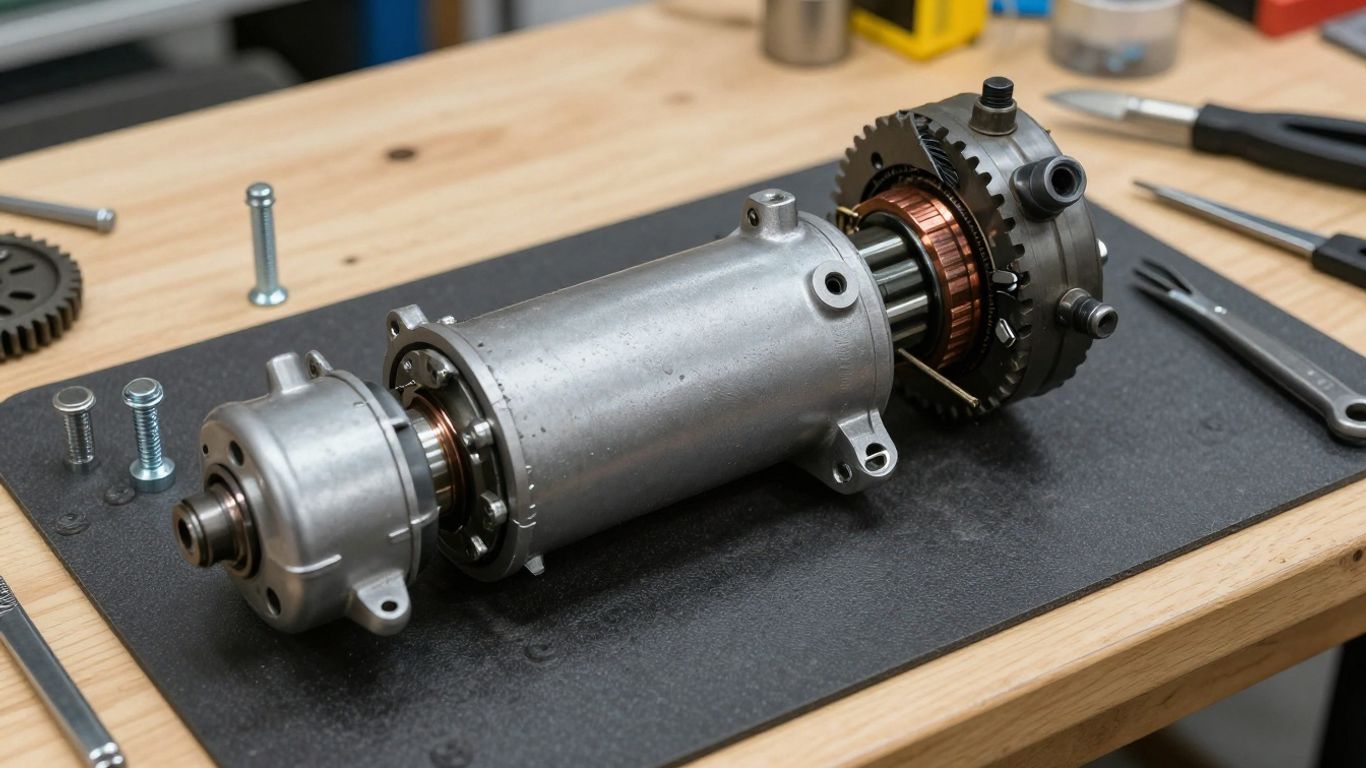
Starter motor housings and mounting points
The housing supports the motor and holds it in alignment with the engine. Check the flange shape, locating features, bolt-hole positions, and overall length before assuming another unit will fit. Even a small difference in the mounting face can leave the drive gear misaligned.
Inspect the housing for cracks, distortion, damaged threads, and heavy oil contamination. The mounting surface should be clean and secure so the starter can maintain both mechanical alignment and a dependable ground path where the design requires it.
Armatures, brushes, and brush holders
The armature is the rotating electrical core, and the brushes transfer current to its commutator. Brushes gradually shorten and can lose proper contact; a worn or burnt commutator can also reduce motor output. The brush holder must keep each brush correctly positioned and spring-loaded.
Internal inspection should look for uneven commutator wear, overheated windings, loose connections, and brush dust. Brush condition matters greatly because a starter may work intermittently when contact is marginal, making the fault appear more mysterious than it is.
Solenoids, drive gears, and overrunning clutches
The solenoid pushes the drive assembly forward and connects the high-current circuit. The drive gear must have the correct tooth count, diameter, and direction of rotation for the engine ring gear. Inside the drive, the overrunning clutch allows the engine to turn faster than the starter once it fires.
A damaged gear can produce grinding or incomplete engagement. A slipping clutch may let the motor spin while the engine barely moves, so replacing only the electrical motor would not correct the underlying problem.
Bushings, bearings, and internal hardware
Bushings and bearings support the armature and keep it centered during high-current operation. Excessive clearance allows the armature to move sideways, which can cause noise, drag, or contact between rotating and stationary components. Washers, clips, springs, and insulating pieces are equally easy to overlook during a rebuild.
Compare every removed piece with the replacement kit and keep components organized. Missing insulation or an incorrectly fitted retaining clip can create a new electrical or mechanical fault immediately after assembly.
Diagnosing starter motor faults
Diagnosis should begin with the simplest causes and move toward internal repair only when the evidence supports it. A starter motor can be blamed for a weak battery, a damaged cable, or an engine that is difficult to turn. Testing in sequence avoids unnecessary parts replacement and gives a more dependable result.
Testing the battery before replacing parts
Measure battery voltage at rest, then observe it while the engine is cranked. A battery can show an acceptable resting voltage yet collapse under load because of low charge, age, or internal damage. Confirm that the battery is charged and capable of supplying the required current before removing the starter.
Also check whether the engine turns normally by hand when appropriate and safe. A mechanical problem that increases cranking resistance can overload an otherwise serviceable starter.
Checking voltage drop and electrical connections
Voltage-drop testing under load is more informative than judging a cable by appearance. Test the positive path from the battery to the starter and the ground path from the starter or engine block back to the battery. High resistance at a terminal, crimp, fuse link, or ground strap can sharply reduce starter performance.
A practical diagnostic sequence is:
- Clean and tighten the battery terminals.
- Inspect the positive cable for heat damage or corrosion.
- Check the engine-to-chassis ground strap.
- Test the solenoid control signal during a start request.
After each correction, repeat the starting test. If the voltage drop returns to a normal level and cranking improves, the cable system—not the starter internals—was the key fault.
Distinguishing solenoid faults from motor faults
A click with no motor rotation may indicate weak solenoid contacts, insufficient battery current, or a seized motor. No click can point toward the control circuit, a failed solenoid coil, an ignition-switch issue, or an immobilizer-related interruption. Testing the control signal and the high-current output separates these possibilities.
A motor that turns slowly with full voltage at its terminals deserves internal inspection. A solenoid that clicks but fails to pass current points more directly to its contacts or connections.
Recognizing signs of mechanical wear
Grinding, whirring, repeated engagement attempts, and a starter that spins freely without cranking the engine are mechanical warning signs. Look at the drive gear for chipped or rounded teeth and check for excessive shaft play. Ring-gear damage may be limited to one section if the engine often stops in a similar position.
Use sound, visual inspection, and test results together. Replacing a drive gear without checking the ring gear can leave the same noise in place.
Choosing compatible replacement parts
Correct fitment is the central purchasing decision. A starter that bolts on but has the wrong gear, rotation, electrical terminal, or output can damage the ring gear or fail to crank the engine. Use the vehicle details and the old unit together rather than relying on a broad model search.
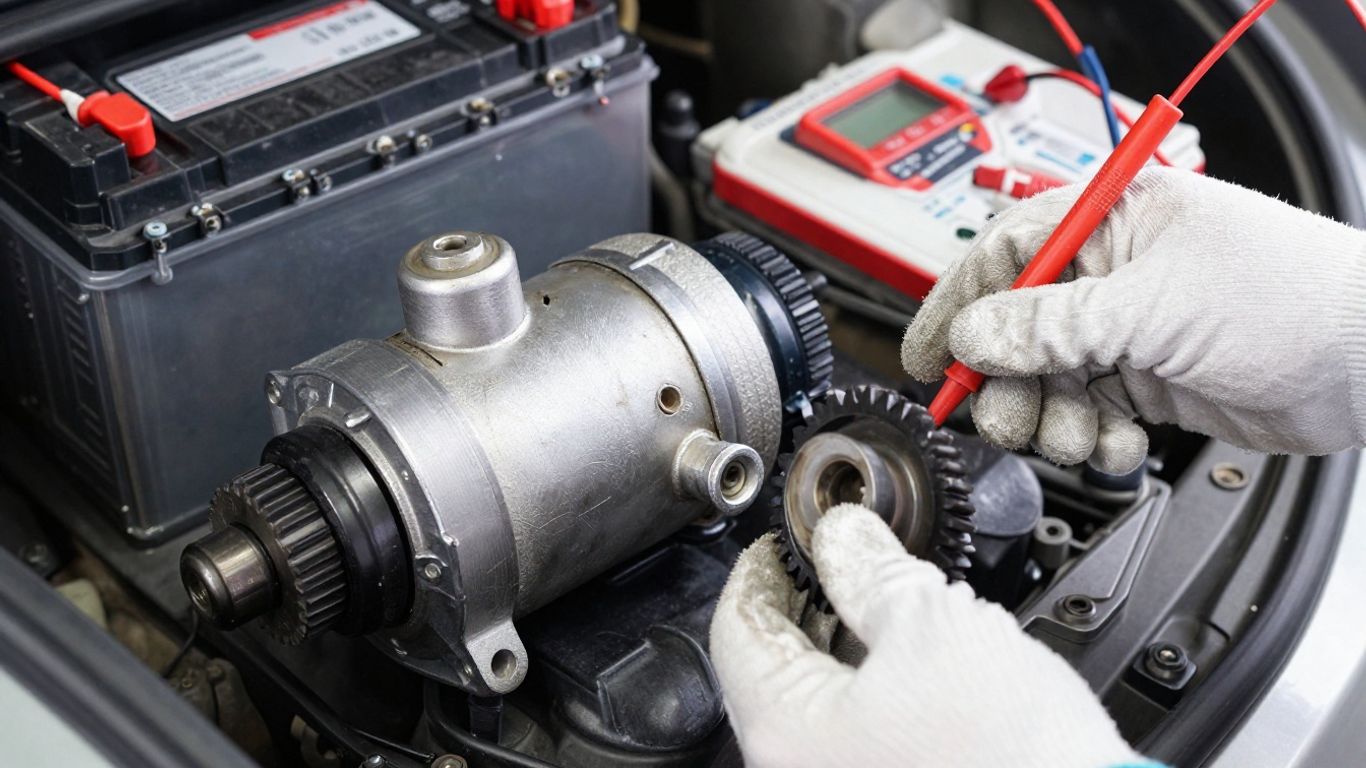
Matching parts to the model, engine, and year
Start with the exact model, engine size or engine code, production year, transmission, and market where applicable. Model names can cover several engines and starter arrangements. The original starter’s label and physical dimensions provide a valuable second check.
A replacement listing for a Kyron, for example, should still be compared against the vehicle’s engine and the removed unit. The Kyron starter motor assembly page is a useful example of why model and year information belong in the search, but it should not replace direct fitment verification.
Comparing original and aftermarket components
Original-equipment and aftermarket options can both be suitable when their specifications and quality are appropriate. Reconditioned units may involve an exchange arrangement, so check whether a surcharge or return of the old unit applies. New components can simplify the purchase, while a professionally rebuilt unit may be sensible when the core is sound.
The SSANGYONG starter motor range illustrates how listings can vary by voltage, output power, tooth count, and condition. Treat those details as specifications to compare, not as interchangeable features.
Using part numbers and starter motor specifications
Part numbers are usually more reliable than a photo or a broad vehicle description. Record the number from the original unit, then compare voltage, power rating, tooth count, rotation, mounting holes, flange dimensions, terminal arrangement, and overall length. A near match is not necessarily a safe match.
A simple comparison table can keep the decision grounded in measurable details:
| Specification | Original unit | Replacement listing | Match required |
|---|---|---|---|
| Voltage | Record from label | Confirm listing | Yes |
| Output rating | Record from label | Confirm listing | Yes |
| Drive-gear teeth | Count or verify | Confirm listing | Yes |
| Mounting pattern | Measure or compare | Confirm drawing | Yes |
Once the entries agree, retain the old unit’s label and the seller’s specification sheet with the vehicle records. That information helps if a return or later repair is needed.
Verifying fitment before ordering
Ask for clarification when the listing lacks an engine code, part number, or clear mounting information. Compare connector shape and terminal position as well as the bolt pattern. The Tivoli starter motor listing shows why a vehicle-specific search can narrow the options, but the final choice still needs confirmation against the individual car.
Check return terms, core requirements, delivery details, and warranty coverage before payment. A slightly slower purchase is preferable to forcing an uncertain part into place.
Rebuilding or replacing the starter motor
The choice between rebuilding and replacing depends on the condition of the core, the availability of parts, and the cost of labor. A starter with worn brushes or bushings may be repairable, while one with burnt windings, a damaged housing, and severe gear wear may not be economical to restore. The diagnosis should guide the decision.
When individual parts can solve the problem
Brushes, brush holders, bushings, bearings, solenoids, and drive assemblies can often address a clearly identified fault. Rebuilding makes sense when the armature, housing, magnets, and mounting points remain serviceable. The unit should be cleaned, measured, and tested rather than fitted with parts by appearance alone.
Use a rebuild kit whose components match the starter’s design. Mixing an otherwise similar brush holder or drive gear can create alignment and electrical problems.
When a complete starter motor is the better choice
A complete replacement is usually more practical when several major components are worn or when internal damage is extensive. It can also reduce downtime when labor access is difficult and the replacement has verified specifications. Compare the cost of parts, machining, testing, and reassembly with the price of a suitable complete unit.
Do not choose a complete starter solely because it is convenient. It still needs the same checks for voltage, output, rotation, tooth count, terminals, and mounting dimensions.
Tools and safety precautions for removal
Disconnect the negative battery cable before working on the starter, then secure the vehicle on level ground with suitable support. Depending on access, you may need sockets, extensions, a torque wrench, a test meter, cleaning supplies, and a way to label electrical connections. Never rely on a jack alone beneath a vehicle.
Photograph cable routing before removal and protect the disconnected cable ends from accidental contact. Allow exhaust and nearby components to cool, and follow the vehicle’s service information for tightening sequences and access procedures.
Installation checks after replacement
Before reconnecting the battery, confirm that the starter is seated flat, fasteners are tightened correctly, and cables are attached to the proper terminals. Check that no wire can contact the exhaust or moving parts. Then test the system with the engine in a safe, neutral condition and listen for clean engagement.
A successful first start is not the only check. Inspect for abnormal noise, slow cranking, heat at the cable ends, and repeated engagement after the engine fires.
Avoiding common starter motor parts mistakes
Many starter repairs fail because the original diagnosis was too narrow. A new component cannot correct an incorrect gear, poor ground, damaged ring gear, or control-circuit fault. Taking a few minutes to compare the complete system is usually cheaper than repeating the removal process.
Installing an incompatible drive gear
The drive gear must match the engine ring gear in tooth profile, tooth count, diameter, and engagement depth. A gear that looks close may grind, bind, or fail to engage fully. Confirm rotation direction as well, especially when comparing units from different applications.
If the old gear shows unusual wear on only one side, inspect alignment and ring-gear condition before ordering another drive assembly. Wear patterns often reveal a fitment problem rather than ordinary age alone.
Ignoring damaged cables or ground connections
A replacement starter may still crank slowly when the positive cable is internally corroded or the engine ground strap is loose. Heat discoloration, swollen insulation, green corrosion, and brittle terminals are reasons to test the cable rather than trust its appearance. Clean contact surfaces and secure fasteners are part of the repair.
Where a ground strap is missing or damaged, restore the intended ground path before judging the replacement motor. The starter needs a low-resistance circuit in both directions.
Replacing parts without testing the full system
Installing brushes, a solenoid, or a complete motor without battery and voltage-drop tests leaves the original cause unresolved. A systematic check also protects the new part from low-voltage operation and excessive heat. Test before removal, after installation, and again if the symptom returns.
Keep the test results with the repair notes. They make intermittent faults easier to trace and reduce guesswork during the next visit.
Overlooking recurring starting-system problems
Repeated starter failures can be caused by long cranking periods, engine resistance, oil contamination, poor charging performance, or a control circuit that keeps the starter engaged. Look for the reason a component failed rather than treating each replacement as an isolated event. Recurrence is evidence that the wider system needs review.
A charging-system check and inspection of the ring gear can be worthwhile when a starter has failed more than once. The goal is a repair that lasts, not simply another installation.
Maintaining starter motor performance
Starter motors need little routine attention, but the surrounding electrical system deserves regular care. Clean terminals, secure grounds, and a properly charged battery reduce the load placed on the motor. Early attention to slow or inconsistent cranking can also prevent a roadside failure.
Keeping battery terminals clean and secure
Inspect the battery terminals for corrosion, looseness, and damaged clamps. Clean them with suitable equipment, reconnect them securely, and avoid overtightening delicate battery posts. A battery that repeatedly loses charge should be tested rather than repeatedly jump-started.
Check the positive connection at the starter as well. It may be hidden from casual inspection and can loosen or corrode independently of the battery terminal.
Protecting electrical connections from corrosion
Moisture, road salt, oil, and engine-bay heat can damage starter connections over time. Keep covers in place, repair damaged insulation, and use an appropriate protective product after the metal contacts are clean and tight. Do not coat a dirty or loose connection and expect the coating to solve the resistance problem.
During routine servicing, inspect cable routing and clips. A cable rubbing against a bracket can eventually expose conductors and create an intermittent fault.
Monitoring slow cranking and intermittent starts
Slow cranking in cold weather may be normal to a degree, but a clear change from the vehicle’s usual behavior deserves testing. Intermittent starts are especially useful clues when documented carefully: note temperature, time between attempts, clicking sounds, and whether the lights dim. This pattern can help distinguish battery, connection, solenoid, and motor issues.
Arrange a test before the vehicle stops starting altogether. Early diagnosis often leaves more repair options available.
Scheduling inspections for high-mileage vehicles
High-mileage vehicles benefit from periodic checks of battery health, charging voltage, grounds, starter cables, and mounting hardware. An inspection is also sensible after water exposure, electrical work, or repeated jump-starting. Ask for measured results rather than a visual opinion alone.
Preventive checks do not guarantee that a starter will never fail, but they can expose resistance, wear, and poor connections while the vehicle is still usable.
Conclusion
Selecting and repairing Ssangyong starter motor parts is easier when the starter is treated as one part of a complete electrical and mechanical system. Verify the battery and cables, identify the exact internal or external fault, match every replacement specification, and test the finished installation. That method saves time, protects the ring gear, and gives the vehicle a better chance of dependable starting.
Frequently Asked Questions
What does a starter motor do?
A starter motor uses battery power to turn the engine through the ring gear until the engine begins running on its own.
Why does a starter only click?
A click can result from low battery voltage, poor cable connections, faulty solenoid contacts, or a motor that cannot rotate. Testing is needed to separate these causes.
Can a weak battery damage a starter motor?
Repeated operation with inadequate voltage can increase heat and current draw, especially when the engine is cranked for long periods. Battery and charging-system testing is advisable.
Should I rebuild or replace a starter motor?
Rebuilding can suit a unit with limited wear and a sound housing, while a complete replacement may be more practical when several major components are damaged or labor access is difficult.
How do I know if a replacement starter will fit?
Compare the vehicle details and original part number with voltage, output, tooth count, rotation, terminal layout, mounting pattern, and dimensions listed for the replacement.
What causes starter grinding?
Grinding may come from an incorrect drive gear, poor starter alignment, damaged ring-gear teeth, or a faulty engagement mechanism. Continuing to crank can worsen the damage.
How can starter performance be maintained?
Keep battery terminals and grounds clean and tight, protect cable connections, address slow cranking early, and inspect the starting circuit during regular vehicle servicing.