

Key Takeaways
A sound exhaust system supports efficient engine operation, controls emissions, and keeps unwanted noise away from the cabin. The right inspection and replacement process starts with accurate vehicle information.
- Trace the exhaust path from the manifold to the tailpipe before diagnosing a fault.
- Match replacement parts to the exact model, engine, drivetrain, and production year.
- Treat smoke, strong odors, rattles, warning lights, and power loss as reasons to investigate.
- Replace worn gaskets, hangers, clamps, and fasteners instead of reusing damaged hardware.
- Use safe lifting methods and professional help when heat, rust, or emissions components are involved.
Understanding the Ssangyong exhaust system
An exhaust system collects gases from the engine, manages their temperature and emissions, reduces noise, and releases the remaining gases behind the vehicle. Although the layout varies by model and engine, its parts work as one continuous route. Understanding that route makes it easier to separate a small sealing problem from a failure involving a major emissions component.
How exhaust gases move through the system
Combustion gases leave the engine through the exhaust manifold or header. They then pass through sections such as the front pipe, catalytic converter, particulate filter where fitted, center pipe, silencer, and tailpipe. Sensors positioned along the route provide information used by the engine management system, so a leak or damaged connection can affect more than noise levels.
Flow depends on sealed joints and adequate clearance beneath the vehicle. A crushed pipe, internal collapse, or loose hanger can restrict movement or allow gases to escape before they reach the outlet. That is why diagnosis should consider the complete path rather than focusing only on the loudest area.
The role of each major exhaust component
The manifold gathers gases from the engine cylinders, while the front pipe and downpipe carry them toward the treatment components. Catalytic converters help process emissions, and diesel particulate filters capture soot in diesel applications. Further back, silencers and mufflers reduce sound before the tailpipe directs gases away from the body.
Gaskets and clamps keep adjoining sections sealed, while rubber hangers support the system and isolate vibration. Heat shields protect nearby components from excessive temperature. A failure in a small mounting part can eventually strain a pipe or converter, so supporting hardware deserves the same attention as the larger sections.
Differences between petrol and diesel exhaust systems
Petrol and diesel engines can use similar pipe and silencer arrangements, but their emissions-control requirements differ. Diesel systems may include a diesel particulate filter and related sensors, while petrol systems commonly rely on catalytic conversion and oxygen-sensor feedback. The exact equipment depends on the engine specification and the vehicle’s production configuration.
This distinction matters when ordering parts. A visually similar pipe or converter may not have the correct sensor ports, heat protection, internal construction, or connection points. Confirming the engine and emissions specification first prevents an expensive mismatch.
Signs that an exhaust part is failing
A failing component may produce a metallic rattle, a deeper-than-usual exhaust note, vibration through the floor, or a hiss during acceleration. Other clues include a strong exhaust odor, visible soot around a joint, reduced performance, and a warning light. Some faults develop slowly, while a broken hanger or pipe can become obvious after one impact.
Do not assume that a quiet system is a healthy one. Small leaks can be difficult to hear from the driver’s seat, particularly with road noise present. If fumes enter the cabin, stop using the vehicle until the cause has been assessed, because exhaust gases can be dangerous.
Common Ssangyong exhaust parts and their functions
Exhaust parts vary in shape, sensor provision, pipe diameter, and mounting design. A replacement should be selected as a complete fitment decision, not simply by matching a photograph. The SsangYong exhaust system parts range is one useful reference point when comparing the types of components commonly available.
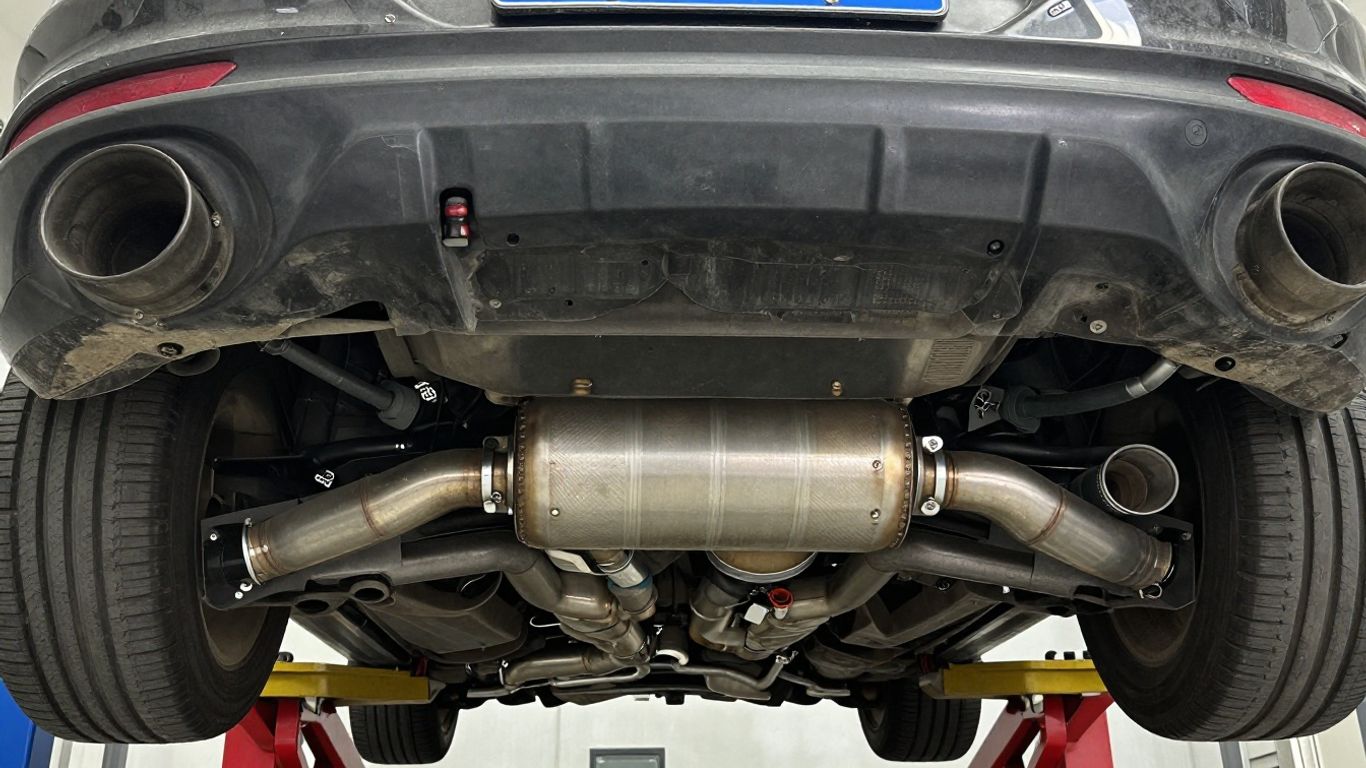
Exhaust manifolds and headers
The manifold bolts directly to the engine and collects exhaust gases from the cylinder head. Because it experiences repeated heating and cooling, it can develop cracks, warped sealing faces, or failed studs. A leak near the engine may sound like a sharp ticking noise and can expose nearby wiring or hoses to extra heat.
Headers use individual runners that merge into a collector, whereas a manifold is often a more compact cast component. Either design must seal correctly at the cylinder head and connect cleanly to the next exhaust section. When replacing one, inspect the mating surface and fasteners rather than installing the new part over old sealing damage.
Catalytic converters and diesel particulate filters
A catalytic converter treats selected exhaust pollutants as gases pass through its internal substrate. A diesel particulate filter, where fitted, captures soot and periodically needs a regeneration process to clear accumulated material. Neither component should be replaced solely because a vehicle has lost power; the underlying cause may be a sensor, leak, fueling issue, or restriction elsewhere.
Temperatures around these parts can become very high. A damaged substrate may rattle internally, while contamination or repeated short journeys can contribute to problems in a particulate filter. Correct diagnosis and the proper emissions specification are essential before ordering a replacement.
Front pipes, center pipes, and downpipes
These pipes carry gases between the engine-side components and the rear silencing sections. Downpipes and front pipes often include flexible sections or sensor fittings, and they can suffer from cracking caused by vibration and engine movement. Center pipes are exposed to road debris, water, salt, and impacts underneath the vehicle.
Measure and compare connection locations, bends, flange patterns, and sensor openings before installation. A pipe that is only slightly different can place stress on the manifold or rear hangers. For repair options, exhaust repair parts can be a relevant starting point when a flexible section, hanger, or pipe needs attention.
Silencers, mufflers, and tailpipes
Silencers and mufflers reduce exhaust noise through chambers, passages, and sound-absorbing materials. The tailpipe is the final outlet and must extend securely beyond the bodywork. Corrosion commonly begins at seams, drain points, and low sections where moisture collects.
A failed silencer may become louder, rattle internally, or show holes around its shell. Replacement should preserve the original clearance from the bumper, fuel system, suspension, and heat-sensitive trim. Decorative changes should never compromise safe gas routing.
Exhaust gaskets, clamps, and mounting hardware
Gaskets create the seal between flanges, clamps hold slip joints together, and hangers carry the weight of the system. These inexpensive parts often determine whether a replacement remains quiet and leak-free. Reusing a crushed gasket or badly rusted clamp can undo otherwise careful work.
Choose hardware designed for exhaust temperatures and the relevant joint type. Check that rubber hangers are not stretched, split, or soft from oil contamination. Replacing weakened support pieces at the same time as a pipe can reduce strain on the new component.
How to diagnose exhaust problems
Exhaust diagnosis begins with observation and proceeds toward confirmation. Noise, odor, visible damage, engine behavior, and diagnostic information should be considered together. A methodical approach is safer and usually avoids replacing sound parts by guesswork.
Identifying unusual sounds and vibrations
A cold-start tick near the engine can point toward a manifold or flange leak, while a hollow rattle may come from a loose heat shield or damaged silencer internals. A thump over bumps often suggests a hanger or alignment issue. Vibration that changes with engine speed can also indicate a strained flexible joint or pipe contact.
Listen with the vehicle stationary only when it is safe to do so, and never place hands near hot or moving components. Sound can travel through the metalwork, so the loudest point is not always the fault location. Comparing the noise during startup, idle, and gentle acceleration can narrow the search.
Recognizing smoke, odors, and performance changes
Visible smoke from the tailpipe should be assessed by color, duration, and operating conditions, but exhaust smoke is not a diagnosis by itself. Strong fumes around the vehicle may indicate a leak, while sluggish acceleration can be associated with restriction, sensor faults, or unrelated engine problems. Fuel economy changes are another reason to check the complete system.
The cabin is the wrong place to investigate a suspected leak. Ventilate it, avoid prolonged driving, and arrange a professional inspection if fumes are present. A short record of when the odor or performance change occurs can help a technician reproduce the problem.
Checking for leaks and visible damage
With the system cool, inspect pipes, flanges, welds, flexible sections, shields, and hangers. Look for black soot marks, holes, crushed areas, fresh impact damage, and gaps at joints. Lightly moving a cool section by hand can reveal a broken hanger, but force should not be used on a corroded pipe.
A smoke test or suitable diagnostic procedure can confirm a small leak that is hard to see. Do not block the tailpipe or run the engine in an enclosed space. Safety comes before certainty when inspecting a system that may contain hot surfaces and harmful gases.
Using warning lights and diagnostic codes
A warning light can indicate that the engine management system has detected an emissions-related condition, but the stored code usually identifies a system or sensor behavior rather than naming the failed part with certainty. Read the code, inspect the wiring and connectors, and check for leaks before replacing a converter or particulate filter.
A scan tool is most useful when its results are combined with physical inspection and live data where appropriate. Clear a code only after the repair and follow-up check are complete. If the light returns, the original cause may remain unresolved.
Choosing the right Ssangyong exhaust parts
Correct fitment is the central concern when buying exhaust components. Two vehicles with the same badge may use different engines, wheelbases, transmissions, emissions equipment, or production-year revisions. Record the vehicle identification number and compare the replacement against reliable catalog information before placing an order.
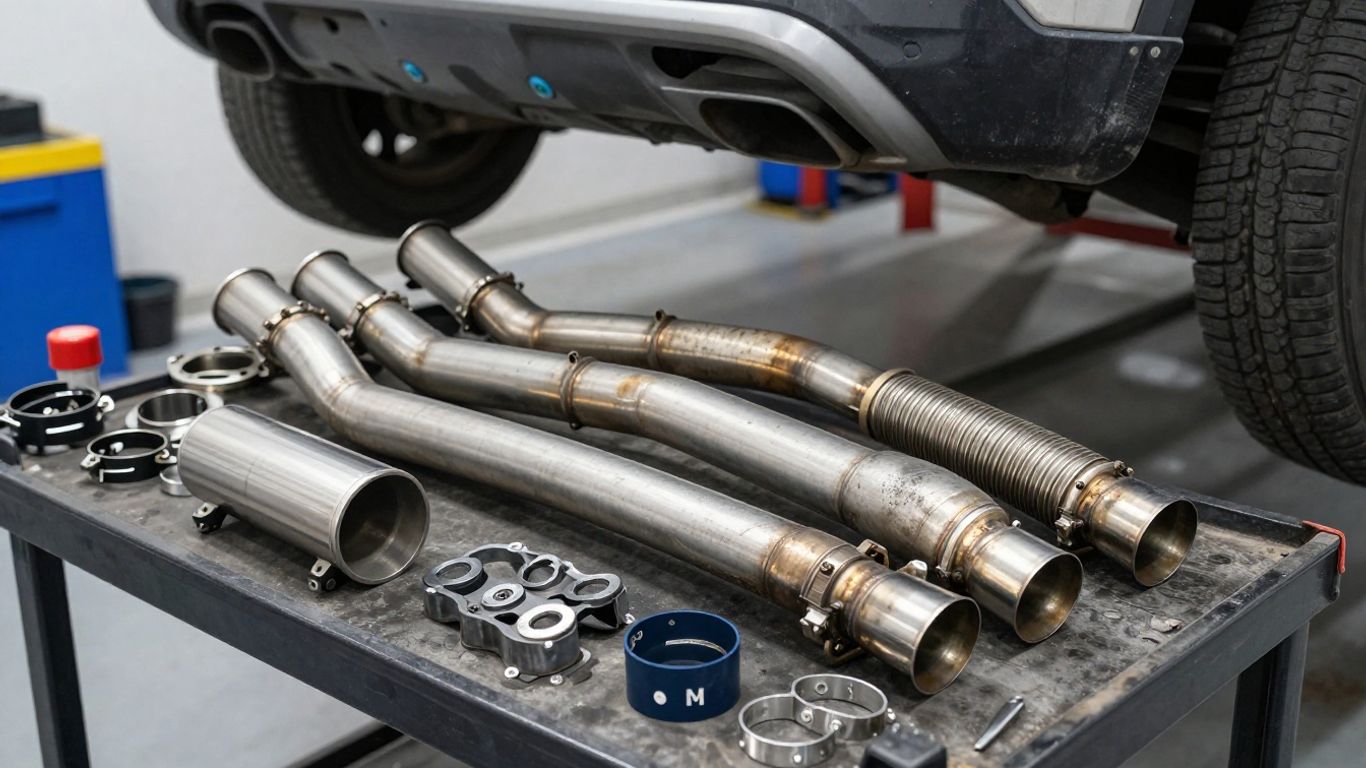
Matching parts to the model, engine, and production year
Start with the exact model designation, engine type, fuel, drivetrain, body style, and production year. Then verify whether the vehicle has a turbocharger, particulate filter, oxygen sensors, temperature sensors, or other fittings associated with the section being replaced. The focus keyword, ssangyong exhaust parts, describes a broad category rather than one universal component.
Part numbers, dimensions, flange shapes, and sensor positions should agree. If a catalog lists several revisions, use the vehicle identification number or compare the original part directly. Ask for clarification before purchase when the listing does not show the relevant connection details.
Comparing genuine, aftermarket, and refurbished components
Genuine parts are made for the vehicle’s original specification, while aftermarket parts can offer different pricing and availability. Refurbished components may be suitable in some situations, but their condition, internal substrate, corrosion level, and remaining service life need careful checking. The best choice depends on fitment, emissions requirements, expected use, and the supplier’s documentation.
Avoid choosing solely on the lowest price. A part that needs modification, returns too much noise, or fails shortly after installation can cost more than a correctly specified component. Keep the invoice and part number for future reference.
Checking material quality and corrosion resistance
Exhaust components face heat cycles, moisture, road salt, vibration, and occasional impacts. Compare the material, weld quality, wall thickness, protective finish, and drain provisions where these details are documented. Stainless materials can resist corrosion well, but the grade and construction still matter.
Examine bends for flattening and welds for pinholes. Flanges should be even, mounting brackets should sit in the correct position, and flexible sections should not be twisted. These physical checks are especially useful when product photographs are limited.
Verifying fitment, certifications, and warranties
A trustworthy listing should identify compatible vehicles and explain any emissions or sensor requirements. Check whether the component meets the regulations that apply where the vehicle is registered, and confirm what the warranty covers. Some warranties require professional installation, proof of purchase, or use of new gaskets and hardware.
Before buying, request missing information in writing. A detailed quote and clear returns policy make it easier to resolve a wrong-part issue. For general supplier evaluation, a professional service checklist can help organize questions about workmanship, materials, warranty, and support.
Replacing and installing exhaust components
Exhaust replacement combines mechanical work with heat and emissions safety. The job may be straightforward when fasteners are clean and the vehicle is supported correctly, but corrosion can turn a simple repair into a difficult one. Plan for inspection, removal, fitting, and testing rather than treating installation as a single quick step.
When professional installation is recommended
Professional installation is sensible when the work involves a catalytic converter, diesel particulate filter, manifold studs, seized flanges, welding, or severe corrosion. A workshop can use suitable lifting equipment, heat-resistant procedures, diagnostic tools, and leak-testing methods. It can also verify that the replacement has not disturbed sensors or wiring.
Home replacement may be reasonable for an accessible rear section if the owner has the right equipment and experience. Never work beneath a vehicle supported only by a jack. If the system is hot, damaged near the fuel system, or difficult to separate, stop and arrange qualified help.
Preparing the vehicle and required tools
Allow the exhaust to cool fully, park on a stable level surface, and secure the vehicle with appropriate stands and wheel chocks. Gather penetrating fluid, sockets, extensions, replacement gaskets, clamps, hangers, gloves, eye protection, and a torque wrench when specified. Photograph the original routing before removing anything.
Useful preparation steps include:
- Confirming the replacement part and all included hardware.
- Disconnecting or protecting sensors without pulling their wiring.
- Supporting the exhaust before removing the final hanger or flange.
- Keeping removed fasteners organized by location.
This preparation reduces the chance of twisting a pipe or discovering halfway through the job that a required gasket is missing. It also makes reassembly easier when several sections have similar-looking joints.
Handling seized bolts, rust, and damaged fasteners
Rusty fasteners should be treated patiently. Apply penetrating fluid, allow time for it to work, and use the correct socket to reduce rounding. Heat, cutting, or drilling may be required, but those methods need careful control around fuel lines, wiring, shields, and other heat-sensitive parts.
Do not force a corroded flange until the pipe or bracket is properly supported. Replace damaged studs, nuts, clamps, and gaskets rather than trying to make weakened hardware serve again. If cutting is necessary, protect the surrounding vehicle and plan how the new section will be secured.
Checking alignment, clearances, and leak-free connections
Loosely assemble the system first so the pipes can settle into their intended positions. Check clearance from the body, suspension, driveshaft, fuel lines, and heat-sensitive trim before tightening the joints. Hangers should sit naturally rather than being pulled sideways to reach their brackets.
After tightening according to the relevant specification, start the engine in an open, well-ventilated area and listen for leaks. Inspect for contact, abnormal movement, or fumes, then recheck the system after a short drive once it has cooled. A quiet connection is not enough if the pipe is under constant tension.
Maintaining Ssangyong exhaust parts for longer service life
Maintenance cannot stop every failure, but it can reveal corrosion, loose supports, and small leaks before they damage more expensive parts. The underside deserves attention after winter driving, floodwater, rough roads, or an impact. Regular checks are particularly valuable when the vehicle makes frequent short trips or carries heavy loads.
Protecting components from rust and road damage
Keep the underside reasonably clean, especially after driving on salted roads or through muddy water. Do not coat hot exhaust components with unsuitable paint or underseal, since trapped moisture and heat can create new problems. Look for dents and scrapes after contact with a curb, stone, or uneven surface.
A sound mounting arrangement helps prevent repeated impacts. If corrosion has perforated a pipe or silencer, surface treatment will not restore its structural strength. Repair or replacement should be based on the depth and location of the damage.
Inspecting hangers, joints, and heat shields
Check rubber hangers for cracks, stretching, and oil contamination, and inspect clamps and flanges for rust or movement. Heat shields should be secure and should not buzz against the exhaust. A loose shield may be harmless to emissions but irritating and capable of masking a more serious rattle.
A quick visual inspection can be added to routine servicing, tire changes, or underbody cleaning. Pay close attention to areas where different metals meet, because galvanic corrosion and trapped moisture can weaken joints. Small mounting repairs are often easier than replacing a pipe that has been allowed to hang incorrectly.
Maintaining catalytic converters and diesel particulate filters
Emissions components generally benefit from a healthy engine, correct fueling, and timely attention to warning lights. Misfires, oil consumption, coolant entry, or sensor faults can damage a catalytic converter. A diesel particulate filter may struggle when operating conditions do not allow its intended regeneration process.
Do not attempt an improvised cleaning or forced regeneration without confirming the vehicle’s procedure and the reason for the fault. A blocked filter, failed sensor, or engine problem needs a different remedy from a normal maintenance event. Diagnostic testing should guide the decision.
Scheduling inspections and responding to early warning signs
Set an inspection interval that reflects driving conditions rather than relying only on a fixed calendar. Frequent short trips, winter salt, towing, rough roads, and coastal moisture justify closer attention. Early symptoms such as a new rattle, soot mark, or change in exhaust note should be recorded and checked.
A simple maintenance record can include the date, mileage, symptoms, part replaced, and any diagnostic codes. That history helps identify recurring failures and supports warranty discussions. For broader online reputation and service follow-up practices, a review management guide may be useful to service businesses, though it is separate from vehicle diagnosis.
A vehicle owner comparing service information may also encounter unrelated guides, such as recovery strategies, local search planning, or mortgage renewal options; those subjects do not replace technical exhaust advice, so keep the repair decision grounded in vehicle data and qualified inspection.
Conclusion
Choosing and maintaining exhaust components is mainly a matter of accurate identification, careful inspection, and safe installation. Follow the system from the engine to the tailpipe, address small leaks and mounting problems early, and use professional help when emissions equipment or severe corrosion makes the work uncertain.
Frequently Asked Questions
How long do exhaust parts usually last?
Service life varies with climate, road salt, driving patterns, material quality, engine condition, and exposure to impacts. Regular inspection is more useful than relying on one universal mileage figure.
Can an exhaust leak affect engine performance?
Yes, a leak can alter sensor readings, introduce extra noise, and sometimes contribute to drivability symptoms. The effect depends on the leak’s location and size, so testing is needed before identifying the cause.
Is a louder exhaust always a serious problem?
Not always, but a new or rapidly worsening sound commonly indicates corrosion, a damaged silencer, a loose shield, or a leaking joint. It should be inspected rather than dismissed.
What information is needed to order a replacement part?
Provide the model, engine, fuel type, drivetrain, body style, production year, and vehicle identification number when available. Photos and measurements of the original connections can provide additional confirmation.
Can I drive with a small exhaust leak?
Driving with a leak may expose occupants to fumes and can allow a minor fault to worsen. If fumes enter the cabin or the system is loose, stop driving and arrange an inspection.
Why do exhaust hangers matter?
Hangers support the system and help isolate vibration. When one fails, pipes can contact the body, strain flanges, or crack near flexible sections and joints.
Should a warning light always mean the catalytic converter needs replacement?
No. The warning may relate to a sensor, wiring issue, air leak, engine fault, or other emissions condition. Read the code and complete physical testing before replacing an expensive component.