

Key Takeaways
Sound brake calipers are essential to even, predictable braking. Correct fitment, careful inspection, and proper bleeding matter as much as the caliper itself.
- Match the caliper to the vehicle’s exact model, year, axle, and side.
- Watch for pulling, uneven pad wear, fluid leaks, heat, vibration, and unusual noises.
- Check discs, pads, hoses, slide pins, pistons, and brake fluid before choosing a repair.
- Refurbishment can suit a serviceable housing, while severe corrosion usually calls for replacement.
- Brake work should finish with leak checks, pedal checks, cautious road testing, and bedding.
Understanding Ssangyong brake calipers
Ssangyong brake calipers sit at each disc brake and convert hydraulic pressure into clamping force. They must move smoothly enough to apply and release the pads without dragging. Although the basic principle is simple, the correct part depends on the vehicle, axle, side, and brake package.
What brake calipers do in the braking system
When the brake pedal is pressed, fluid pressure travels through the hydraulic circuit to a piston inside the caliper. The piston pushes the inner pad toward the disc, while the caliper arrangement brings the outer pad into contact as well. Friction between the pads and rotating disc slows the wheel, and the caliper keeps the pad assembly correctly positioned.
A caliper that cannot release cleanly may keep generating heat after the pedal is released. One that cannot develop or hold pressure may reduce braking at that wheel. Either condition deserves prompt inspection rather than being treated as normal wear.
Fixed and floating caliper designs
A floating, or sliding, caliper moves on guide pins so its pads can clamp the disc from both sides. A fixed caliper stays in one position and normally uses pistons on both sides of the disc. The design affects the mounting arrangement, service parts, and the way movement should be assessed during inspection.
The Ssangyong Kyron brake calipers reference explains the practical distinction between floating and fixed types and is useful when comparing a listing with the caliper on the vehicle. Do not assume that parts sharing a model name are interchangeable across every engine or production year.
Common Ssangyong models and compatible calipers
Korando, Kyron, Musso, and other vehicles in the range can use different calipers according to generation, engine, drive layout, axle, and disc size. A registration or VIN lookup is often safer than relying on a model name alone. The Korando brake parts listing, for example, is organised around a specific 2015–2019 2.2 Diesel application, including four-wheel-drive variants.
Before ordering, record the vehicle identification details and compare the old caliper’s mounting points, hose connection, bleed screw position, and pad shape. A photograph can help, but it should support—not replace—catalogue and vehicle-data checks.
How calipers work with pads, discs, and brake fluid
Calipers are one part of a matched system. Pads need the right dimensions and friction material, discs need sufficient thickness and a suitable surface, and fluid must transfer pressure without excessive contamination or air. A new caliper fitted beside badly worn pads or a damaged disc may not restore balanced braking.
That is why diagnosis should consider the whole corner of the vehicle. A restricted hose, seized guide pin, or disc runout can produce symptoms that initially look like a caliper fault. Balanced braking depends on the complete assembly, not one isolated component.
Recognizing signs of a faulty brake caliper
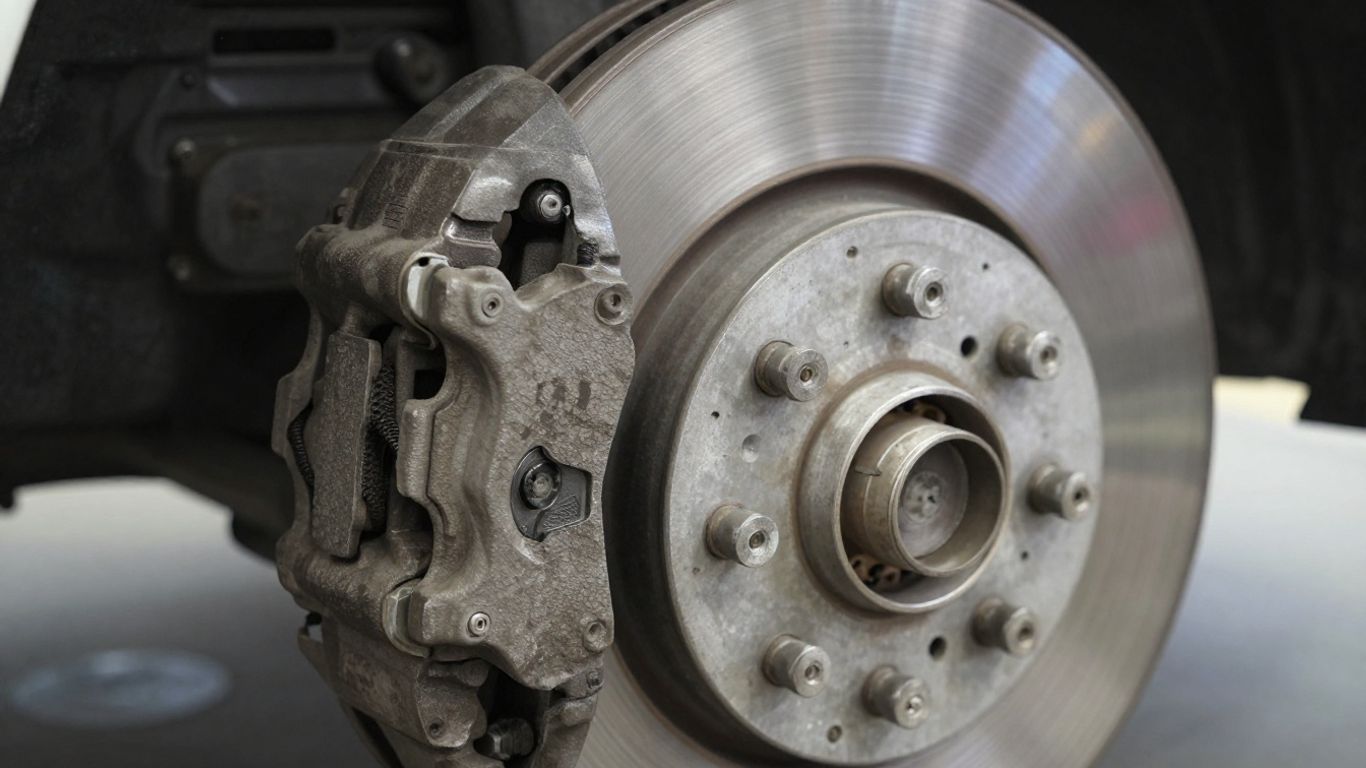
Brake caliper problems often appear as changes in the vehicle’s behavior rather than as an obvious broken part. Compare the two sides of the axle and look for heat, wear, and fluid evidence. A single symptom is not always conclusive, but several appearing together warrant stopping use until the system is checked.
Pulling to one side while braking
A vehicle that pulls left or right under braking may have unequal clamping force. A sticking piston, restricted hose, seized slide, or contamination on one side can all contribute. Tire pressure, suspension wear, and alignment can also cause a pull, so the caliper should be assessed alongside those possibilities.
The safest first response is to reduce driving and arrange an inspection, particularly if the pull is sudden or strong. Continuing to brake hard with one side doing more work can increase heat and lengthen stopping distances.
Uneven brake pad wear
Pads that are much thinner on one side of a caliper, or thinner at one end than the other, suggest that movement is not occurring normally. In a floating design, stiff slide pins can prevent the outer pad from releasing or applying evenly. A piston that binds can create a similar pattern.
Measure and compare the pads rather than judging them through the wheel spokes. The disc surface, pad backing plates, guide hardware, and caliper boots should be examined at the same time because replacing only the visibly thin pad may leave the cause unresolved.
Brake fluid leaks and low fluid levels
Fluid around the caliper, hose joint, bleed screw, or piston area is a serious warning. The reservoir level may fall as a result, though a low level can also reflect pad wear or a leak elsewhere in the system. Hydraulic fluid on pads usually means the contaminated parts cannot simply be wiped clean and returned to service.
Do not top up indefinitely while ignoring the source. The leak must be identified, the affected components repaired or replaced, and the system bled with the correct fluid before the vehicle is driven normally.
Overheating, burning smells, and wheel vibration
A dragging caliper can make one wheel noticeably hotter than the opposite side after a short drive. A sharp friction smell, blue discoloration, smoke, or vibration through the steering wheel points to excessive heat or a related disc problem. Never touch the disc or caliper immediately after suspected overheating.
Once cool, inspect for pad glazing, disc damage, melted boots, and discoloration. Heat may have affected seals, fluid, bearings, and nearby components, so a simple visual check of the caliper alone may be insufficient.
Noises caused by sticking or damaged components
Grinding, scraping, clunks, and repeated squeaks can arise from a sticking piston, loose pad hardware, worn slide components, or a damaged dust boot. A noise that changes when the brake pedal is applied is especially useful diagnostic information, but it does not identify one component with certainty.
Note when the sound occurs—during the first stop, while turning, after warming up, or continuously. That detail helps a mechanic separate caliper movement from pad, disc, wheel-bearing, and suspension issues.
Choosing the right Ssangyong brake calipers
The cheapest-looking listing is not necessarily the least expensive choice if it requires additional hardware or fails to match the existing brake package. Start with verified vehicle details, then compare condition, warranty, included fittings, and return terms. Good selection prevents many installation problems before the vehicle reaches the workshop.
Matching calipers to the exact model and year
Use the registration, VIN, production year, engine, drive type, and axle position when searching. Model names can cover several generations with different brackets, piston sizes, and disc dimensions. If the catalogue asks for a registration lookup, use it rather than selecting a generic model entry.
The Musso brake repair information page illustrates why model-specific diagnosis matters: symptoms, repair needs, and costs can vary even when the general caliper function is familiar. Confirm the part number against the old unit where possible.
Comparing original equipment and aftermarket options
Original equipment parts usually offer the most direct reference point, while reputable aftermarket units can provide a practical alternative. Compare the manufacturer’s specifications, piston and seal quality, supplied brackets, and warranty rather than judging by finish alone. A remanufactured part may also be suitable when its inspection and replacement process is clear.
Ask whether the price covers the complete caliper or only the bare body. Clarify whether pads, slide hardware, banjo washers, or exchange-core requirements are included before committing to the purchase.
Checking left- and right-hand fitment
Many calipers are side-specific because the bleed screw and hose connection must sit in the correct orientation. A caliper installed on the wrong side may trap air or place the hose under strain. Check the seller’s left-hand or right-hand designation and compare the mounting geometry with the removed part.
Never reverse sides simply because the mounting bolt spacing appears similar. The bleed point must be positioned so air can leave during bleeding, and the hose must follow its intended route without rubbing the wheel or suspension.
Evaluating caliper materials, coatings, and piston quality
Cast iron and aluminum are both used in brake hardware, with different weight, corrosion, and heat characteristics. More important than appearance is the condition and specification of the bore, piston, seals, dust boots, slide pins, and mounting surfaces. A clean coating cannot compensate for a damaged bore or poor seal fit.
Look for clear information about testing and included parts. Surface corrosion may be cosmetic, but corrosion around a seal land, piston, or mounting face can affect safe operation and service life.
Confirming compatibility with existing discs and pads
The replacement caliper must work with the disc diameter, thickness, offset, and pad shape already fitted. Even a physically mountable part may position the pad incorrectly or fail to provide adequate clearance. Measure the disc and compare pad references when the brake history is uncertain.
Replacing a caliper is a useful moment to inspect both pads and the disc. If either is contaminated, cracked, deeply scored, or below its service limit, include it in the repair plan rather than expecting the new caliper to overcome the defect.
Ssangyong brake caliper replacement process
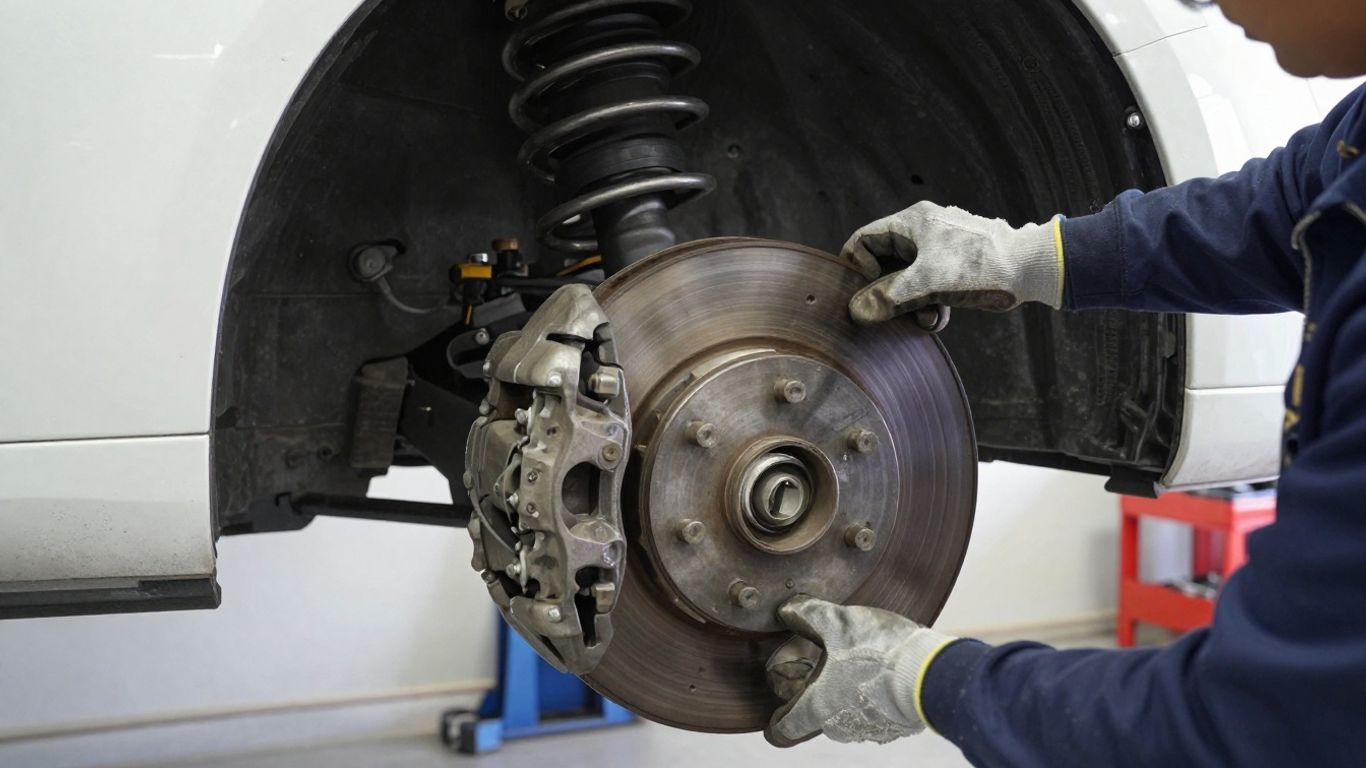
Caliper replacement is a hydraulic brake repair, so cleanliness and control matter from the first inspection. The vehicle must be securely supported, and the work area should prevent dirt from entering open hydraulic connections. The exact fasteners and torque values must come from the vehicle’s service information.
Inspecting the braking system before removal
Before removing anything, compare both sides of the axle and identify the cause of failure. Check pad thickness, disc condition, hose flexibility, fluid level, slide movement, piston behavior, and signs of leakage. Photographing hose routing and hardware positions can make reassembly less error-prone.
Confirm that the replacement matches the old part and that new sealing washers or other required hardware are available. If the disc is heavily overheated or the pad is fluid-contaminated, plan that work before opening the hydraulic circuit.
Removing the old caliper safely
Secure the vehicle on suitable stands and remove the wheel according to the service procedure. Support the caliper so its weight does not hang from the flexible hose. Disconnect the hose with appropriate tools, cap the open line cleanly, and remove the mounting hardware without forcing components that may be under tension.
Brake dust should be handled carefully, and compressed air should not be used to blow it into the air. Keep removed parts organised because washers, clips, and slide hardware may not be interchangeable.
Installing the replacement caliper
Clean the mounting surfaces and install the replacement in the correct orientation. Transfer or replace hardware only when it is approved for that application, and lubricate guide components with a brake-compatible product where the service instructions call for it. Make sure pads sit squarely and move in their intended channels.
Tighten mounting bolts to the specified torque and check that the disc rotates without abnormal contact. The caliper should be stable, the pads should be retained correctly, and no boot or seal should be twisted during assembly.
Reconnecting the brake hose and securing fittings
Reconnect the hose using the correct sealing washers or fitting arrangement, keeping the hose free from twists. Route it as designed and turn the steering through its range to confirm that it does not stretch, rub, or contact the wheel. A connection that looks tight can still leak if a washer is reused or a mating surface is damaged.
Wipe the area clean before bleeding so any fresh fluid is easy to identify. Do not allow brake fluid to contact painted surfaces, rubber parts not designed for it, or the friction faces of pads and discs.
Bleeding the brakes and checking for leaks
Bleed the affected circuit using the specified procedure and fluid type, keeping the reservoir from running dry. Continue until the fluid is clear of air bubbles and the pedal feels firm. The sequence can vary by vehicle, so follow the applicable service information rather than assuming one universal order.
After bleeding, hold pedal pressure and inspect every connection for seepage. The caliper refurbishment service describes replacement of items such as seals, dust covers, slider bushes, and bleed nipples; those same areas deserve close attention when checking a rebuilt or replacement unit. The pedal must not slowly sink, and the wheel should turn as expected before road testing.
Brake caliper refurbishment versus replacement
Refurbishment can be sensible when the caliper body and mounting points remain sound. It is not simply a cosmetic repaint: the unit should be dismantled, cleaned, inspected, resealed, and tested appropriately. Replacement is usually more straightforward when the housing or piston bore is badly damaged.
When refurbishment is a practical option
A rebuild may suit a caliper with serviceable metalwork but worn seals, boots, slide bushes, or bleed hardware. It can preserve an otherwise correct original unit and may be useful where a matching replacement is difficult to source. The decision should follow inspection, not age alone.
Ask what the refurbishment includes and whether the completed unit is tested. A short turnaround or attractive price is useful only when the internal work is thorough and the correct parts are used.
Components commonly replaced during a rebuild
A proper rebuild may involve seals, dust covers, slider bushes, bleed nipples, and pistons where inspection shows they are worn or damaged. Guide pins and pad hardware should also be checked. Not every caliper needs every component, but omitted defects can quickly undermine the repair.
The service scope should be written clearly on the quote. That makes it easier to compare a rebuilt unit with a new or exchange unit and prevents assumptions about parts that are not included.
Risks of using a poorly refurbished caliper
A reused piston with corrosion under the seal, a hardened boot, or an inadequately cleaned bore can cause sticking and fluid loss. Incorrect assembly may also create uneven pad contact or allow air to remain in the hydraulic circuit. These faults may not be visible from the outside.
Choose a rebuilder that can explain inspection, component replacement, testing, and warranty arrangements. If those answers are vague, a lower purchase price may lead to additional labor and another period off the road.
Comparing refurbishment and replacement costs
Compare the complete installed cost rather than the part price alone. Include shipping, exchange deposits, seals or fittings, cleaning, painting, bleeding, and any pads or discs needed because of contamination or heat damage. A replacement may cost more initially but reduce uncertainty and fitting time.
A refurbished unit can offer value when the scope is documented and the housing is sound. Get both options assessed against the same symptoms so the choice reflects condition rather than a simple percentage saving.
When corrosion or damage requires a new caliper
Deep corrosion in the piston bore, damaged mounting threads, cracks, distorted ears, or severe erosion around sealing surfaces can make refurbishment unsuitable. A bent or damaged housing should not be returned to service merely because replacement is inconvenient.
The caliper also deserves replacement when the correct rebuild parts are unavailable or when previous repairs have left the body compromised. Brake safety should decide the boundary, not the desire to salvage every component.
Maintaining Ssangyong brake calipers
Calipers generally benefit from routine brake inspections rather than a fixed replacement timetable. Maintenance is about keeping movement free, seals intact, and hydraulic fluid clean. It should happen alongside pad and disc checks, especially after driving through water, mud, or salted winter roads.
Cleaning calipers without damaging seals
Use a suitable brake cleaner and a soft brush to remove loose dust and road grime. Avoid scraping rubber boots, directing aggressive chemicals at seals, or using high-pressure water close to hydraulic joints. Do not disturb a dust boot merely to make the component look cleaner.
Once clean, inspect the areas around the piston and slide pins. If contamination has entered under a boot, cleaning the outside will not correct the underlying problem; the component may need to be dismantled and serviced.
Preventing corrosion in wet and salty conditions
Road salt collects around calipers, brackets, and pad contact points. Regular rinsing can reduce deposits, but the brakes should be allowed to dry and the friction surfaces must remain free of protective coatings. Any corrosion found during a wheel-off inspection should be assessed before it affects movement.
Avoid painting sliding surfaces, piston areas, pad abutments, or threads unless the product and procedure specifically allow it. Protective treatment belongs on appropriate external surfaces, not where it can interfere with brake operation.
Inspecting slide pins, boots, and pistons
Slide pins should move smoothly and their boots should be seated without splits or tears. Pistons should extend and retract in a controlled way, with no visible fluid seepage or rust at the seal area. A torn boot allows water and grit to turn a minor maintenance issue into a seized component.
Inspect both sides of the axle for comparison. If one pin is dry, one pad is dragging, or one boot is damaged, deal with the cause before installing new pads and assuming the problem is solved.
Replacing brake fluid at suitable intervals
Brake fluid absorbs moisture over time and can become less effective under heat. Follow the vehicle maker’s recommended interval and use the specified fluid. Fluid replacement is also appropriate after opening the hydraulic system, provided the correct bleeding process is used.
Keep the reservoir and tools clean, and never mix fluids casually. A firm pedal after service is reassuring, but it does not replace inspection for leaks or confirmation that the fluid is correct.
Balancing caliper maintenance with pad and disc servicing
Caliper work should be coordinated with pad thickness, disc measurements, and hardware condition. New pads on a sticking caliper may wear quickly, while a new caliper paired with badly scored or overheated discs may produce poor contact. Check the complete axle before ordering parts.
A sensible service record can note pad measurements, disc thickness, fluid condition, and any slide or piston concerns. That makes recurring faults easier to spot and helps distinguish normal wear from a developing hydraulic problem.
Safety, costs, and professional installation
Brake repairs involve safety-critical hardware and should be approached more carefully than routine cosmetic maintenance. Costs vary with the vehicle, part source, seized fasteners, hydraulic work, and whether pads or discs are also damaged. A written estimate should separate the caliper, associated parts, labor, fluid, and testing.
Typical parts and labor cost factors
The final price may include a new, used, refurbished, or exchange caliper; fitting hardware; brake hose parts; fluid; bleeding; and disposal or return-core charges. Labor rises when fasteners are corroded, hoses are seized, or additional heat damage is found. Pairing work on an axle may also affect the estimate.
Ask whether the quoted caliper is complete and whether the warranty covers both the part and the labor. Comparing like-for-like quotes is more useful than choosing the lowest headline price.
When a qualified mechanic should do the work
Professional installation is the sensible choice if you lack secure lifting equipment, the correct torque information, brake bleeding equipment, or experience with hydraulic systems. It is also appropriate when the cause of the fault is uncertain or the vehicle has suffered severe overheating.
A qualified mechanic can inspect related components and verify the repair under controlled conditions. DIY inspection may help identify symptoms, but do not drive a vehicle with a soft pedal, active leak, or severe pull to a workshop unless it can be transported safely.
Post-installation checks and road testing
Before moving the vehicle, check the pedal with the engine off and running, inspect for leaks, confirm wheel clearance, and make sure tools and supports are removed. The pedal should feel firm and remain stable under sustained pressure. The wheel should rotate without abnormal drag once the brake is released.
Road testing should begin at low speed in a safe area with gentle stops. Recheck for pulling, noise, vibration, smell, and heat after the test, then inspect the fittings again. Any unexpected change means the vehicle should return for diagnosis rather than continued use.
Brake bedding procedures after caliper replacement
New pads and discs generally need a controlled bedding process so their surfaces mate progressively. Follow the pad and disc manufacturer’s instructions, using moderate stops and allowing cooling time rather than repeated hard braking from high speed. Avoid holding the pedal firmly at a standstill immediately after a very hot stop.
Bedding does not cure a sticking piston, leaking hose, or incorrectly fitted pad. If the vehicle pulls or the wheel overheats during the process, stop and investigate the mechanical cause.
Warning signs that require immediate attention
Stop driving and arrange professional help if the brake pedal becomes soft, fluid leaks, smoke appears, or one wheel becomes extremely hot. A sudden pull, grinding sound, or loss of braking also calls for immediate caution. Do not rely on topping up fluid or pumping the pedal as a permanent fix.
Keep the vehicle stationary until the system has been checked when the warning is severe. A short journey can turn a correctable caliper fault into disc, bearing, tire, or wider hydraulic damage.
Conclusion
Choosing and caring for Ssangyong brake calipers is mainly a matter of accurate identification, careful diagnosis, and disciplined installation. Match the part to the vehicle, assess the entire brake corner, and treat leaks, dragging, heat, and uneven wear as reasons for prompt attention. When the job involves hydraulic work or uncertain damage, professional inspection is the safest route.
Frequently Asked Questions
What is the main job of a brake caliper?
A brake caliper uses hydraulic pressure to press brake pads against a rotating disc, creating friction that slows the wheel and vehicle.
How can I tell if a caliper is sticking?
Common clues include pulling during braking, uneven pad wear, a hot wheel, a burning smell, persistent squealing, or drag after the brake pedal is released.
Can only one brake caliper be replaced?
It can be possible when the opposite caliper is healthy and the parts match, but both sides of the axle should be inspected carefully to preserve balanced braking.
Does a brake caliper need to match the brake pads?
Yes. The caliper, pad shape, disc dimensions, mounting arrangement, and piston position must be compatible for correct contact and clearance.
Is a refurbished brake caliper safe?
A refurbished caliper can be safe when it is correctly dismantled, inspected, rebuilt with suitable components, tested, and backed by clear warranty terms.
Why must brakes be bled after caliper replacement?
Opening the hydraulic system can allow air to enter. Bleeding removes that air so pedal pressure is transferred consistently to the caliper.
How soon can I drive after replacing a caliper?
Drive only after the system has been bled, the pedal is firm, fittings are leak-free, and a cautious low-speed test confirms normal braking.